Showing posts with label Image Manipulation. Show all posts

Tuesday, 30 June 2015

Image Manipulation


Image Manipulation


One Day Project: National Geographic


15/06/15


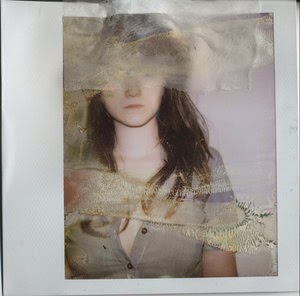
For this one day project, we were instructed to take a photo, or multiple photos of ourself and to manipulate them, whilst included some techniques, such as soft portraiture effects. 


The idea of this project was to introduce some new techniques and put them into practice so that we would know how to use them in the future, and it was also to create some artwork that would go into an exhibition for the foundation and second year students.

The National Geographic was used as a template for the entire piece. There were some strict requirements that were to be met, as all pieces made would be put together for the exhibition and so had to have the same font, size, spacing and all images used had to have a white background.


 The head title of each piece could be anything, and so we weren't restricted with this, as long as it fit the font and size requirements and fit into the correct space. The small statement underneath the title could also include anything within reason, as long as it included your name and also fit the requirements.


I created four designs, and with each I tried using multiple different effects. The first effect I used was Gaussian Blur, which would help to create an airbrushed effect, which is often used in industry to make things look better and to make facial features less harsh, therefore making people look more attractive.

The first design I created was the red one, which was the most difficult to figure out. Once I had done the effects and managed to meet the requirements for the piece, I could then begin to experiment using different filters. The second piece I created was the green one, which I experimented with using the Filter Gallery in photoshop. With this I used a ripple effect, changed the size and erased some of the parts that I didn't want, or that I wanted to make stand out.


The third piece I created was the brownish one, which I once again went into the filter gallery and used the mosaic tile effect. For the blue piece I mainly experimented with curves rather than any filters. This gave it a colourful twist.

My chosen piece was the green one because of the colours and the effect.

For each piece, the writing and the border colour was taken from a colour somewhere inside the image I had used.


How to create a soft portraiture effect:


The first thing I had to do was to change the levels and curves within the image, and crop anything out that I didn't want. Because one of the specifications was to have a white background, this would mean cropping out anything in the image background that wasn't white or that couldn't be changed through selective colour to white.


Once this was done, the image was to then be duplicated twice.
Once the image was duplicated, the copies were then to be renamed, the first copy 'Lighten', and the second copy 'Darken'. 

Then, going into the drop down list where it says 'normal', one the copy of the image called 'Lighten', you would chose the option 'Lighten', and on the copy labeled 'Darken', you would chose the option 'darken'.


The Lighten Layer would be changed to 60% opacity, and the darken layer to 40% opacity.

After this, the Gaussian Blur effect could then be added. Click on the 'Lighten' layer first.


The Gaussian Blur effect can be found in the filter heading under the blur option.

With this effect, you could then choose the intensity of the blur.


Once you had chosen the intensity, you then go into the 'Darken' layer and do the same, by simply going into the filter heading. Gaussian blur should now be at the top of the list, and simply clicking on it will add the same effect to this layer.

After this is done, you then merge the layers together by holding shidt and selecting both the 'Lighten' and 'Darken' layers, then going into the menu drop down list at the top of the box and clicking on Merge Layers.


After doing this, you then click on the small rectangle icon at the bottom of the box.


Making sure the white box is highlighten, you can then go into the eraser tool and bring back any features of the face that you want to stand out using a varying opacity and softness.


After this was done, I then had to create the template for the image to go in to. I did this using Illustrator.

Once in Illustrator, we had to measure an actual National Geographic book for the dimensions and then create a page of the same size. After measuring, I could then add in rulers and lines to the template. The border had to be a certain thickness as well. Once the border was complete ( I used the rectangle tool to do this and just dragged it over the entirety of the page.) Once I had done this, using the guidelines, I then created  smaller white rectangle for the middle, which would create a background for my image. 


Monday, 1 June 2015

Image Manipulation

Image Manipulation


Further Experimentation With Anthropomorphism


01/06/15


 As further experimentation with Anthropomorphism, I decided to pick small parts of an animal to work with and experiment with instead of the whole animal. I chose to incorporate an animals eye into a human face.

While I feel that they eye fits into the image, I feel that it is much to bright and doesn't completely fit in, as it stands out. Next time I will change the brightness of the eye before adding it into the complete image.
After I had put the eye into place, I then began to erase the areas around it that weren't needed, and fade the edges so that it fit better and blended in better with the photo. once tis was done, I merged the layers and began to add filters. I changed the saturation and the brightness, and also added a coloured layer over-top to add an aged look to the image. Once all of this was done, I added some noise.

Image Manipulation

Image Manipulation


Research into Animal Experimentation


01/06/15


While the experimentation on animals greatly improves the progression of medicine, it is also seen as unethical due to the fact that the experiments induce pains to the animals and also reduce the quality of their life. 
The people who conduct the experiments are well aware of the morals involved, however, and agree that animals would not be used if there were another method that would produce the same results. Tests are made as humane as possible.

A ban in animal testing would either result in the use of humans as test subjects, or an end to drugs testing.

Arguments against animal testing:

- Animals suffer
- There are no proven benefits to humans

There are possible replacements to experimentation on animals such as:

- Experimenting on cell cultures instead of whole animals
- Using computer models
- Studying human volunteers
- Using epidemiological studies

Animal Experiments and Animal rights:


The issue of animal experimentation is simple if we accept animals have rights. If animals have rights, and an experiments violates said rights, it is then morally wrong. If the rights are violated, the benefits to humans are then irrelevant, because it is never rights to violate rights.

Justifying Animal Experimentation:


Those in favour of animal testing say that the good done through the experiments outweigh the harm done to animals, however this argument cannot be fully justified, as some suffering cause is beyond the benefits to humans, even if the results are exceptionally valuable.


Many countries have banned animal testing, and many companies are against animal testing, and campaign against it, as well as promote animal cruelty free goods, however, in medical terms, it is still a prominent factor is the progression of medication.

BBC Animal Testing/ Experimentation


Prominent cases in Animal Testing:


The Multi-Dog (1950):


A soviet scientist named Vladimir Demikhov pioneered the field organ transplant by using dogs. In an infamous experiment, he fashioned a multi-dog. In this experiment, he removed most of a small puppies body and grafted the head and forelegs to the neck of an adult dog. Enough blood was pumped around both the large dog and the small puppy's head from the large dogs heart. When the small puppy woke, the larger dog first tree shaking it off.
Both dogs kept their own personalities post surgery. 
When the smaller puppy became thirsty, the host dog would drink, and when the puppy got hot, the host dog would leave it's tongue to to cool both off.
Six days after the experiment, both heads and the common body died.


EarMouse (1997)

In 1997, Charles Vacanti created an ear of the back of a lab rodent. The ear could not hear anything, as it was just a tissue structure that protruded from the rat back. The ear was grown by seeding human cartilage tissue cells into a biodegradable mold. This stunt was to demonstrate a potential method in cartilage transplantations into human patients. 


How This Research Will Relate To My Idea:


My main goal with this project is to create a shock factor, or something that will disgust people when they look at it. Animal testing is a huge and important factor in todays society and many groups, such as PETA (People for the Ethical Treatment of Animals) have been in full swing, trying to expose animal testing and to promote animal rights. PETA, like me, aim to use the shock factor to disgust people with what is happening to get their point across. A shock factor is key in the promotion of their ideals. I also aim to use the shock factor to disgust people into believing that the hoax I have created is real, which, at the same time, will also promote Animal rights.


Thursday, 30 April 2015

Image Manipulation

Image Manipulation


Research, Experimentation and Evaluation


30/4/15


Continuig with the hoax theme, I have decided to use Anthropomorphism as the base for my project.

What is Anthropomorhism:

Anthropomorphism is the joining of the human form with something that isn't human.

Some exmples of Anthropomorphism that are well known are Mickey mouse.


One of my original idea's was to morph the human face into something animal-like, particularly focusing on furry animals, like cats, however, to begin with, I took images of my friends and asked the to send me images of their pets so that I could create multiple Anthropomorphic images.

This is my friend Rebecca and her cat Kiera. The process at first was rather slow because I had to convert the images into PDF format so that I could then open them in Photoshop.  Once I had converted them I could then begin to edit them.

First I opened the image of the cat into the same document as the person and dragged the tab that included the cat down so that I could have both the images of the cats and the people side by side. Once I had done this I then dragged the image of the cat onto the image of the person. This created two different layers.

After doing this, I then had to bring the opacity down on the cat layer so that I could re size and position the cat properly. After doing this I then used the rubber tool to get rid of my parts of the cat layer that I didn't want, varying the hardness and opacity of the rubber tool to get a seamless effect. Once I had done this I brought the opacity back up.


This is Piotr and my friends cat Clive. This image was a little more challenging than the first because of the position the image of the cat was taken in, and also because more of the persons arms were exposed, making it necessary to add fur onto them so that they fir in with the rest of the image.

I used the same process as I did in the first image, first converting the image into PDF format and then editing it in Photoshop. With this image I had to use a lot more of the cats body than in the first because of the proportions, so the cats body was then used to cover up anything that the cats head hadn't, such as the neck.

To create the fur on the arms, I simply copied another image of the same cat into the image and brought the opacity down so that I could erase any of the image I didn't want and so that it looked right on the arms. The opacity for this layer was left down slightly so that you could still see the arms through the fur.


The process for the images we the same after these steps,
After getting the multiple images to look right, I then merged all of the layers and began to experiment with the colouration of the images, I wanted the images to look quite old, and to do this, I used the same technique as on the UFO images. I changed the RGB levels slightly, as well as the exposure, saturation and also added colour filters.

Overall I am very pleased with the end result of the two images, especially the first, which seemed to work better than the last image. I feel that next time I shall experiment with the same method, however I will try to bring some of the animal features onto the peoples faces, or morph the faces into that of an animals.

Image Manipulation

Image Manipulation


My Ideas


30/04/15


This projects revolves around the idea of creating a hoax using image manipulation, and so I had to come up with an idea that I could then create.
I wanted to create something that strongly provoked emotions in people, like disgust and outrage, so that it didn't just confuse them. To do this, I looked at relevant subject matters that had been provoking people to act, such as animal testing and experimentation on animals to hunting of animals.

At first, I came up with a couple of ideas in a newspaper headline format, so that I could see the context and also get my ideas out in a structured way:

'Surgery of Rabbit and British woman a success'

'Murdered and Decorated: missing people found with extreme dis-figuration and modification- Wild animals used'

The first idea focuses on Anthropomorphism: The joining of human form and something non-human.

The last of the idea's uses 'The Red Dragon' and 'Silence of the lambs' as research, and the idea of body dis-figuration stems from these two films.


Sunday, 26 April 2015

Image manipulation

Image Manipulation

Analysis and Evaluation


26/04/15


A big part of this project is image manipulation, and the theme being hoax makes very good practice to create images that have a believable quality and are on the bizarre side of things.

Because this was a new project, we began by looking at common hoaxes- UFO Sightings, and began to create our own on Photoshop using various methods and some images we had taken of the areas surrounding college.

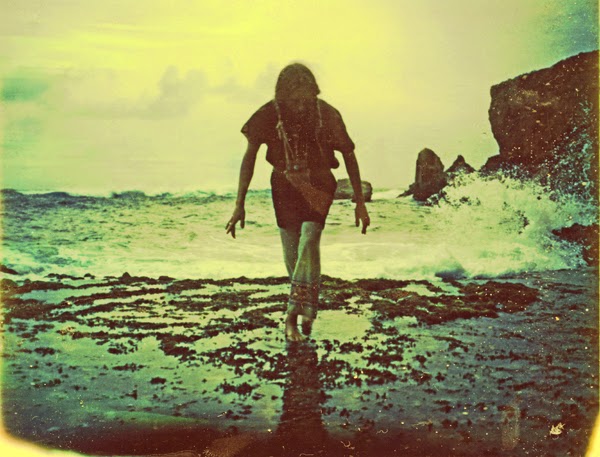
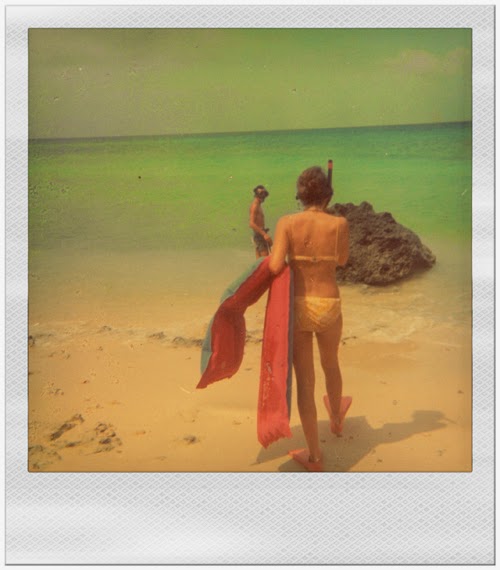
Inspiration for the image manipulation came from Polaroid images, and how, with age, they had worn and become damaged.


To achieve the effect of an aged Polaroid image, we used many different techniques in Photoshop.

The first thing I did was go into Image and Adjustments, and select levels. By doing this you can take out a little bit of colour from the image, in this case, I was lightening the image. After doing this, I once again went into Image and Adjustments, this time however, I went into curves.

 Making sure that the image was an RGB image, I then went on to changing the colour within the image.

Because the image was an RGB image, it meant that I could adjust the amount of red, green and blue within the image. By tweaking the red, green and blue just a little bit, I could then start to get a retro effect on the image.


This technique was used over and over again as we practiced using other images that we had taken.

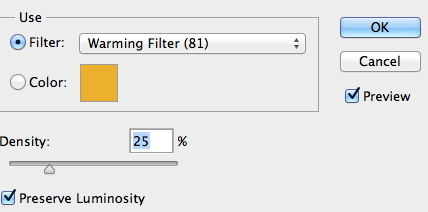
As well as this, we could then experiment by other means. I began by adjusting the vibrance and exposure, and then adding a warm filter on the image to give it a worn but retro finish


Overall I feel that I was unable to get the desired effect on most of my images aside from the last one (pictured above) however even then, it isn't something I was particularly keen on. I wasn't able to get the aged effect I wanted at first because I was unsure of how to do it, however, I feel like my last image was a success.


Monday, 20 April 2015

Image Manipulation

Image Manipulation


Research into existing famous UFO Hoaxes 


20/04/15


Unit 34 consists of taking images and manipulating them to create a new image of bizarre focus. the theme is UFO hoaxes, or hoaxes in general. It needs to look real and believable, and so references to polaroid images is necessary to achieve an end and desired effect.

Famous UFO Sightings/Rumors:

Area 51: Lies within the Nevada test and training range is a remote detachment of Edwards Air Force Base and is known as a restricted area.
The use for the site is unknown publicly, however is, based of previous knowledge, most likely used for the development and testing of weapons systems and experimental aircraft, which has made it a frequent source of conspiracy theories and base of UFO fokelore (Unidentified Flying object)
The area surrounding Area 51 is known as the Extraterrestrial Highway and is a popular destination for tourists.


The Roswell Case (1947): One of the most famous UFO cases to date and is no w a pop culture phenomenon. UFO hunters claimed the US military had acquired an alien spacecraft, however, what was said to be a UFO sighting was said to be, by the military, a surveillance aircraft from a classified operation.


Washington D.C Sighting (1952): Reports of UFO's in Washington's skies were convincingly backed up by mysterious radar contacts at three different airports, however, the US Air Force suggested that is was in fact changes in the temperature that had caused the radar signals to bend and give false returns.


The Hill Abduction (1961): Barney and Betty Hill had claimed to have been kidnapped by aliens after accordingly been followed by a flying saucer while driving in their car. They were supposedly subjected to intimate physical examination, and even recall seeing a 'Star Map' within the space ship. Their story sparked massive public interest because they maintained their story even when under hypnosis.